# How I made a Voxel engine in Rust with Bevy Engine
I stumbled upon this [video](https://www.youtube.com/watch?v=Ab8TOSFfNp4) reading this [post](https://news.ycombinator.com/item?id=43230734) on Hacker News where I saw someone creating a voxel game in one hour using python and a couple of usual python libraries (PyGames, Numpy...). I thougt that one hour was not that much and that as I am quite fluent in Python and a Rust beginner, I might be able to transpose what I saw from one language to another.
## Choosing the material
As the first thing implemented in the video is the app and the PyGame context, I though that I needed to use a game engine myself, and chose to try my hands on the [Bevy Game Engine](https://bevyengine.org/) which seems to be the most well known Rust Game Engine.
### Quickstart tutorial
Having never used a game engine before (except one very basic try with Godot), all the concepts introduced were not very familiar to me, but it was overall a quite straight forward and correctly explained tutorial. But I needed now to understand how to have graphics displayed.
### A better but outdated tutorial
Then I found [this tutorial](https://github.com/fogarecious/bevy_tutorial/blob/main/README.md) which was pretty interesting but already outdated (the Rust scene is evolving at an astounding pace... 🌬 :crab:). Thankfully, the [Bevy example library](https://bevyengine.org/examples/) is very much up to date, with simple yet very clear and well documented examples and therefore I could make up for the deprecated functionnalities.
## Beggining some immplementation :video_game:
It seems that in the video mentionned in the intro, the author makes a deep dive into the OpenGL implementation and other low level stuff. Probably partly because Python is high level and interpreted, and thus has some performance limitations (I know this is not accurate, please don't kill me I'm a Python guy too :knife::snake:), having the author write some black magic to ensure the first frame of his game is rendered before the release of HL3.
But I make the bet that this won't be an issue with Rust (blazingly fast blablabla :fire:). So I'll try to follow the video's implementation order, beginning with the camera.
:::info
I'll be writing all my code inside a plugin in my `lib.rs`, to keep my `main.rs` clean, just for the record. I'll try to keep my `main.rs` with only this:
```rust
use bevy::prelude::*;
use bevy_voxel::BevyVoxelPlugin;
fn main() {
App::new()
.add_plugins(DefaultPlugins)
.add_plugins(BevyVoxelPlugin)
.run();
}
```
:::
### Aaaaand... ACTION :movie_camera:
So I'll finally show some code. Let's create [the default 3D scene](https://bevyengine.org/examples/3d-rendering/3d-scene/) from the Bevy example library (the blue background is just for fancyness 💅):

Now lett's move! At least it's what I thought. But I rapidly stumbled upon something I had heard about, but always overlooked: **quaternions**. It's some advanced math stuff often used in 3D to represent rotations 🧮. In had to play a bit with it, until I reached this function, which allowed me to replicate a Minecraft-like motion with mouse:
```rust
// This is the very function from the [Bevy first person view
// model example](https://bevyengine.org/examples/camera/first-person-view-model/)
// It handles the camera rotation according to the mouse's movements
fn rotate_player(
accumulated_mouse_motion: Res<AccumulatedMouseMotion>,
mut player: Query<(&mut Transform, &CameraSensitivity), With<Player>>,
) {
let Ok((mut transform, camera_sensitivity)) = player.get_single_mut() else {
return;
};
let delta = accumulated_mouse_motion.delta;
if delta != Vec2::ZERO {
let delta_yaw = -delta.x * camera_sensitivity.x;
let delta_pitch = -delta.y * camera_sensitivity.y;
let (yaw, pitch, roll) = transform.rotation.to_euler(EulerRot::YXZ);
let yaw = yaw + delta_yaw;
const PITCH_LIMIT: f32 = FRAC_PI_2 - 0.01;
let pitch = (pitch + delta_pitch).clamp(-PITCH_LIMIT, PITCH_LIMIT);
transform.rotation = Quat::from_euler(EulerRot::YXZ, yaw, pitch, roll);
}
}
```
And keyboard:
```rust
fn move_player(input: Res<ButtonInput<KeyCode>>, mut player: Query<&mut Transform, With<Player>>) {
// Here we handle the key pressed by the player, by modifying his position according ro the
// direction he's aimed at. To do so, we rotate some vector (found by trial and error) by the
// camera rotation and increase or decrease the position accordingly.
// NOTE: The *xxx_directions* vectors definitions are scoped to avoid the computation if no key is pressed. It might be
// useless.
let Ok(mut transform) = player.get_single_mut() else {
return;
};
let mut velocity: Vec3 = Vec3::ZERO;
if input.pressed(KeyCode::ArrowDown) {
let face_direction = transform.rotation.mul_vec3(Vec3::new(0.0, 0.0, 1.0));
velocity += 0.1 * face_direction;
}
if input.pressed(KeyCode::ArrowUp) {
let face_direction = transform.rotation.mul_vec3(Vec3::new(0.0, 0.0, 1.0));
velocity += -0.1 * face_direction;
}
if input.pressed(KeyCode::ArrowRight) {
let straff_direction = transform.rotation.mul_vec3(Vec3::new(1.0, 0.0, 0.0));
velocity += 0.1 * straff_direction;
}
if input.pressed(KeyCode::ArrowLeft) {
let straff_direction = transform.rotation.mul_vec3(Vec3::new(1.0, 0.0, 0.0));
velocity += -0.1 * straff_direction;
}
transform.translation += velocity;
}
```
I will probably re-factor it to match a more Bevy-idiomatic form such as the one in [this example](https://bevyengine.org/examples/movement/physics-in-fixed-timestep/). But for now, I have a scene I can move around (I added some more elements to better show the movements)!


### Building some chunks :cookie:
Ok so now so now that we can move around like a duck to water, we can now begin to build something intesting to move around :duck:! Fisrt idea would be to put cubes everywhere, easy said, easy done! But in fact, we won't do that. In the video, instead of individual blocks, the author builds the chunks all at once, as a unique mesh, with only the outer envelope to avoid rendering all the non-visible faces.
So let's represent a chunk as an array of cube types:
```rust
pub const CHUNK_SIZE: usize = 32;
pub const CHUNK_AREA: usize = CHUNK_SIZE * CHUNK_SIZE;
pub const CHUNK_VOLUME: usize = CHUNK_SIZE * CHUNK_AREA;
#[derive(Debug, Clone, PartialEq)]
pub enum CubeTypes {
Empty,
Dirt,
Stone,
}
impl Chunk {
pub fn new() -> Self {
// We initialize the array with empty type cubes
let mut voxels = vec![CubeTypes::Empty; CHUNK_VOLUME];
// Then we loop over the whole chunk on every coordinates
for x in 0..CHUNK_SIZE {
for y in 0..CHUNK_SIZE {
for z in 0..CHUNK_SIZE {
// We use the 3D simplex function as described in the video
// to generate the cubes types. We'll make a more convincing
// world generation function later
let cube_type =
3.0 * simplex_noise_3d(0.1 * Vec3::new(x as f32, y as f32, z as f32));
// Finally we create a condition to choose between Dirt or Stone cube types
if cube_type >= 1.0 && cube_type < 2.0 {
voxels[x + CHUNK_SIZE * y + CHUNK_AREA * z] = CubeTypes::Dirt;
}
if cube_type >= 2.0 && cube_type < 3.0 {
voxels[x + CHUNK_SIZE * y + CHUNK_AREA * z] = CubeTypes::Stone;
}
}
}
}
Self {
voxels,
//...
}
}
}
```
Then we go throught the hassle of creating faces for rendering, quite similar to OpenGL code, it reminded me of my first Minecraft modding custom cubes creations, where you have to declare your triangle's vertices in counterclockwise order, or else nothing wil ever appear and it an horrible thing to wrap your brain around. That's why for this kind of tedious tasks, I tend to create a function tohandle it once and for all, and then forget it forever.
```rust
fn add_face(&mut self, face_type: FaceType, cube_type: &CubeTypes, cube_center: Vec3) {
let v1: Vec3;
let v2: Vec3;
let v3: Vec3;
let v4: Vec3;
let normal: Vec3;
match face_type {
FaceType::Top => {
v1 = Vec3::new(-0.5, 0.5, -0.5);
v2 = Vec3::new(0.5, 0.5, -0.5);
v3 = Vec3::new(0.5, 0.5, 0.5);
v4 = Vec3::new(-0.5, 0.5, 0.5);
normal = Vec3::Y;
}
// ... Same for each of the six directions,
// with the corresponding coefficients
};
// registering the index of the first vertex we'll add
// for the face's declaration later
let offset = self.vertices_coord.len() as u32;
// declaring vertices and face normals for each
self.vertices_coord.push(v1 + cube_center);
self.vertices_normal.push(normal);
self.vertices_coord.push(v2 + cube_center);
self.vertices_normal.push(normal);
self.vertices_coord.push(v3 + cube_center);
self.vertices_normal.push(normal);
self.vertices_coord.push(v4 + cube_center);
self.vertices_normal.push(normal);
// declaring the triangles in the counterclockwise order based on their number
self.vertices_order.push(offset);
self.vertices_order.push(offset + 3);
self.vertices_order.push(offset + 1);
self.vertices_order.push(offset + 1);
self.vertices_order.push(offset + 3);
self.vertices_order.push(offset + 2);
// declaring the textures on the uv_map based on the old Minecraft texture pack
match cube_type {
CubeTypes::Dirt => {
self.map_texture(5, 2);
}
CubeTypes::Stone => {
self.map_texture(5, 3);
}
CubeTypes::Empty => {}
}
}
```
And to handle the textures declarations, based on this file:
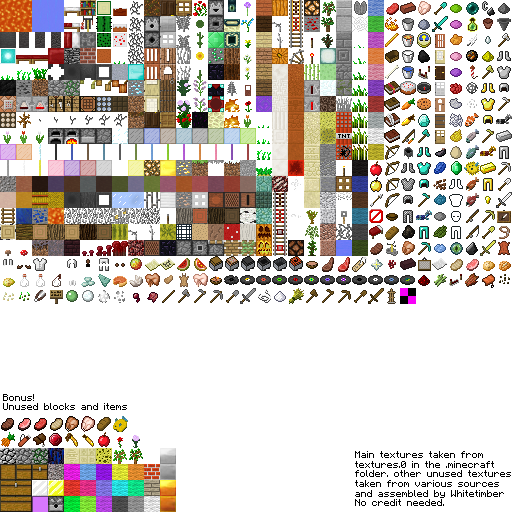
We add a companion function as such:
```rust
fn map_texture(&mut self, coord_x: u32, coord_y: u32) {
if coord_x < 32 && coord_y < 32 {
let (x, y) = (coord_x as f32, coord_y as f32);
self.uv_coord.push(Vec2::new(y / 32.0, (x + 1.0) / 32.0));
self.uv_coord.push(Vec2::new(y / 32.0, x / 32.0));
self.uv_coord.push(Vec2::new((y + 1.0) / 32.0, x / 32.0));
self.uv_coord
.push(Vec2::new((y + 1.0) / 32.0, (x + 1.0) / 32.0));
}
}
```
After some fiddling with the light to obtain something somewhat acceptable for now, let's see our chunk!
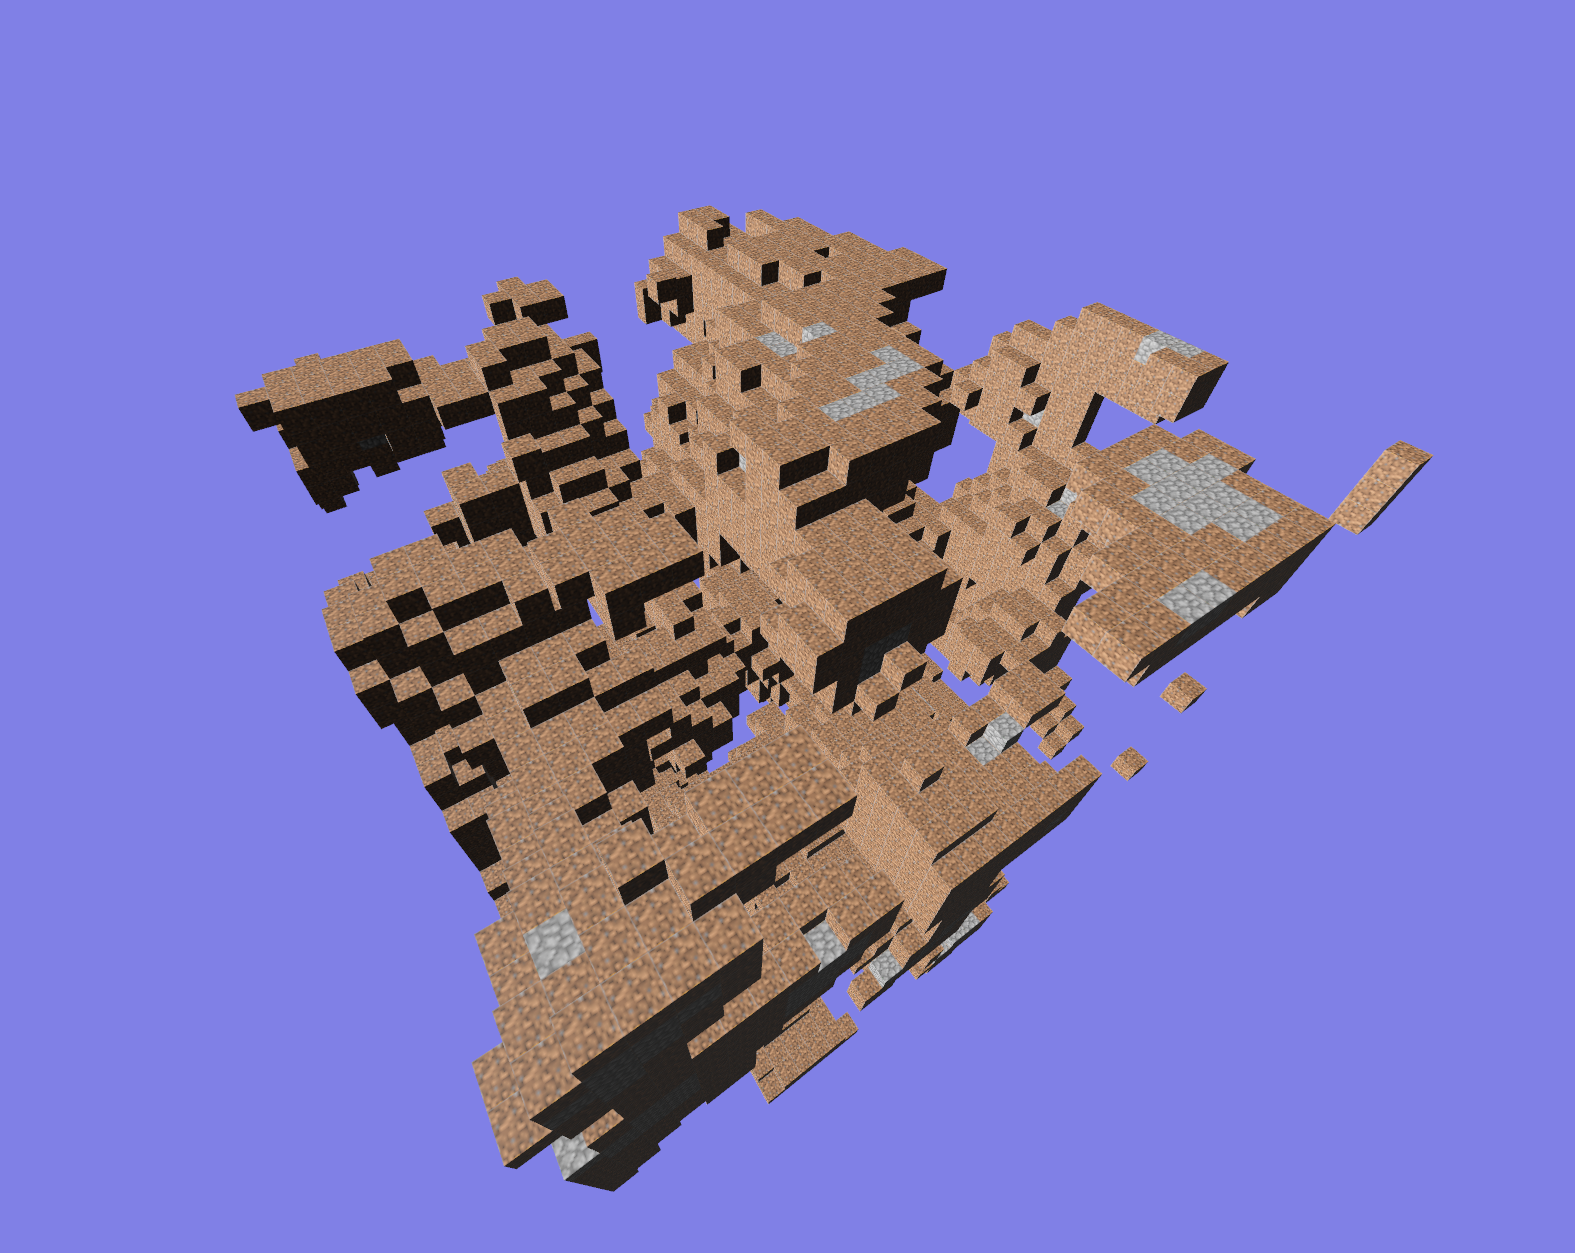
Yeah, pretty messy, I know. But it was a hard work to reach that result, and after we implement the world structure, we will be able to create a real world generation function, to make things pretty!
### And now, the world :earth_africa: !
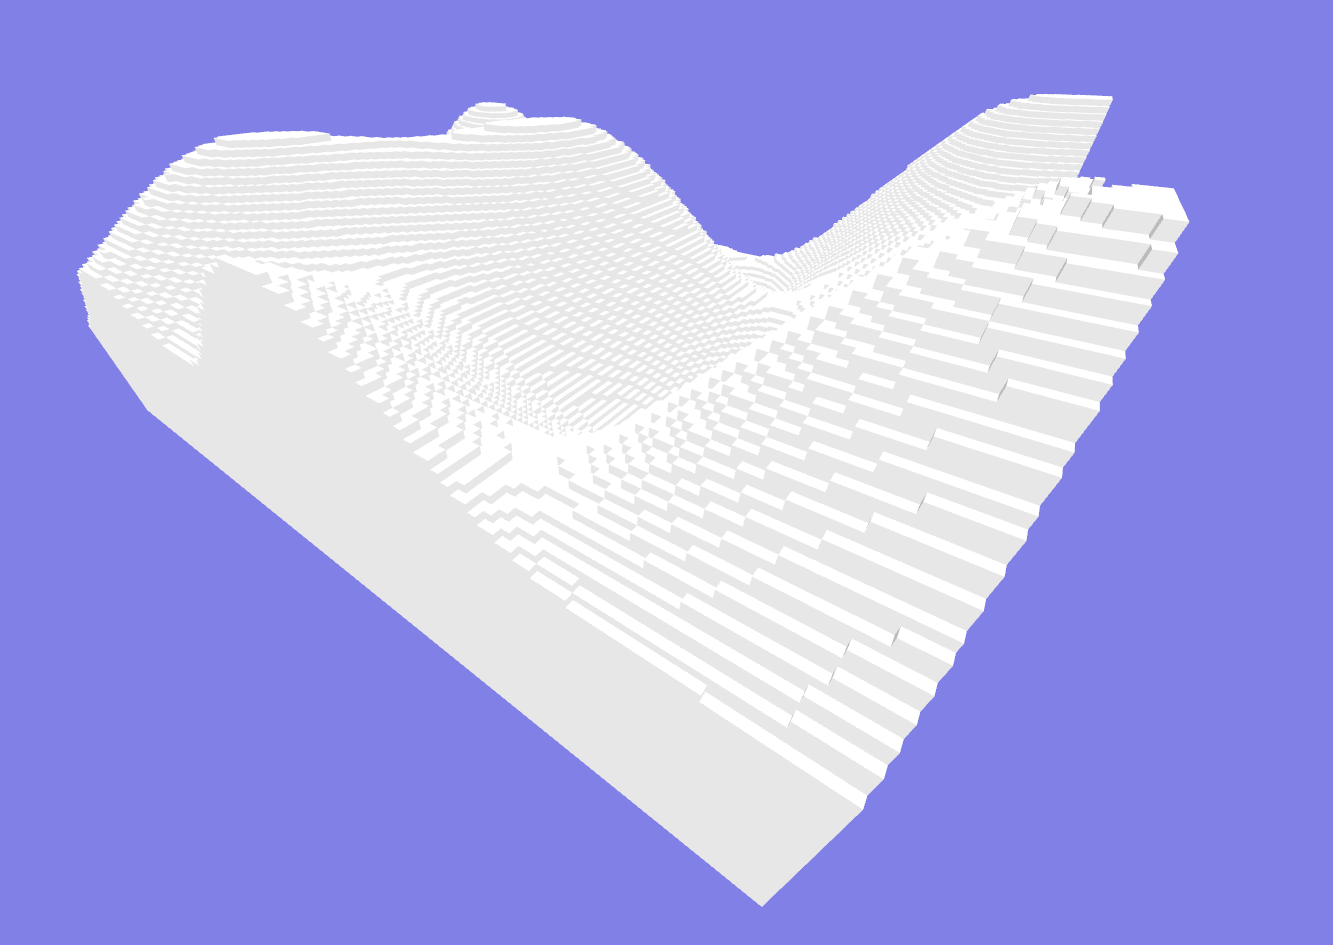
And after a few code refactroring (centralizing constants, changing the whole chunk structure for it to only be a wrapper for the mesh), I can finally play with a world with multiple chunks, and a 2D simplex noise height map:
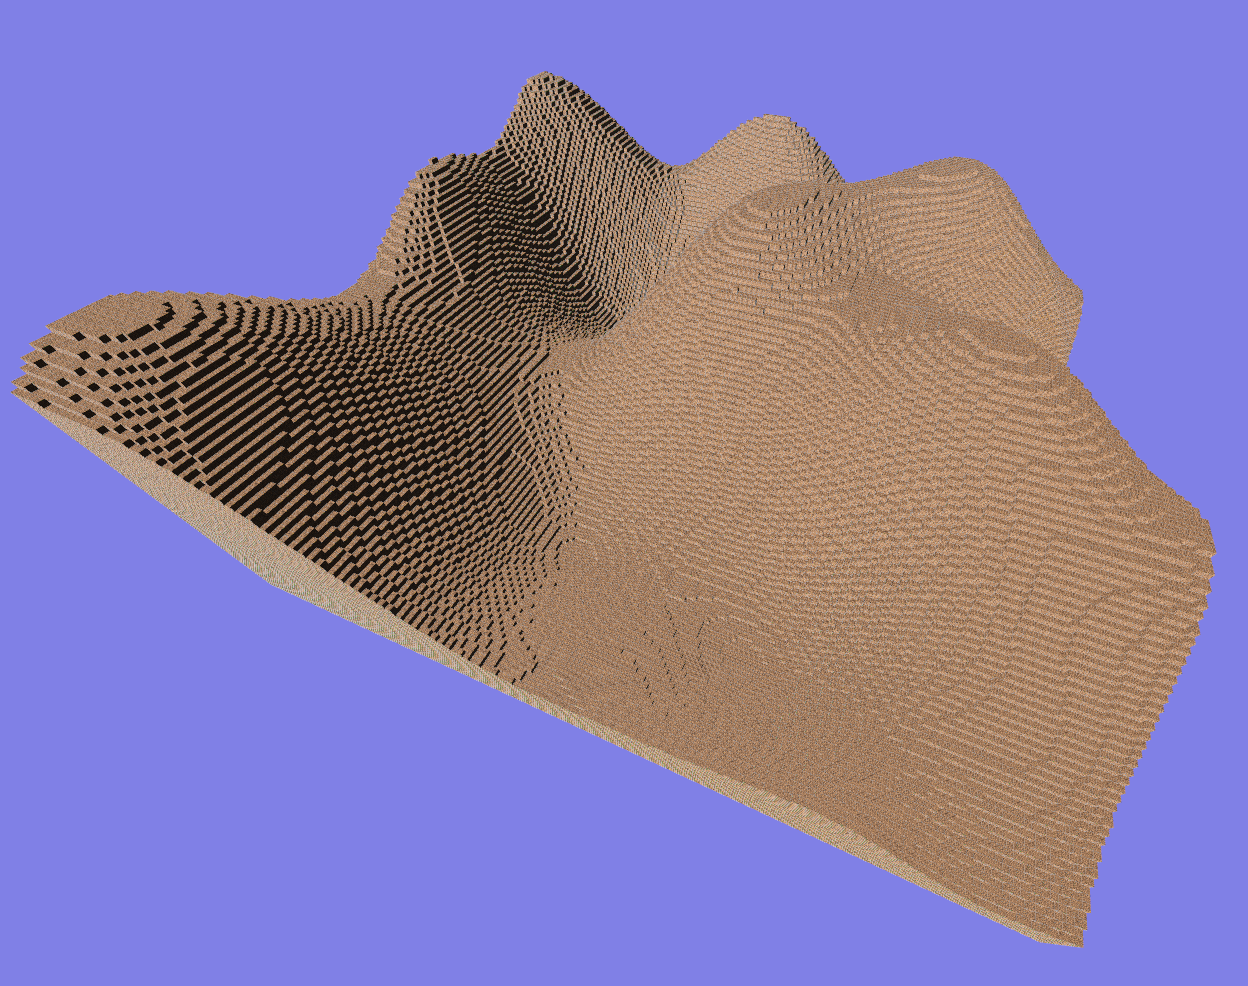
I am very proud of this result, as it was a not a piece of cake.
## Moving into the shader world :ghost:
Ok so I initially thought that I could avoid all the OpenGL part of the video, as I was using a whole game engine, that seemed to be beefy enought to handle all the shading part on its own. Furthermore, the WGSL language used by Bevy is a fairly new technology, meaning that the documentation is essentially... partial let's say.
But as the video was going on, I discovered that many interesting things were implemented in the shader part, and that it could be quite interesting to try the same kind of translation work I've been working on from Python to Rust, but from OpenGL to WGSL. Challenge accepted.
### First, let's fix the blurry textures :eyeglasses:
One of my main pain point with the shader-less approach, was that the textures were looking awfully blurry.
Upon som research, I discovered that it was because of the bilinear filter used by the texture sampler, and that what I'm looking for is a nearest neighbour filter.
Well, after a lot of research, I couldn't find a convincing way of doing it (once again, Bevy and Rust are evolving so quickly that the solutions you find are always a few version behind and often deprecated). So I found
this [code](https://github.com/DGriffin91/bevy_blocky_sampling/blob/main/assets/shaders/blocky.wgsl), which defines a `texture_nearest` function, that perfectly fulfills my needs!
And so, after all the setup needed to use WGSL shaders, here is the result:

Sweet pixel soup isn't it ? But the good news is that the textures are not blurry anymore, and that this way I can have a much greater control over the ambient lighting, shadows and such.
### A bit of context about shaders
I'm a complete begginner in the rendering world, so take everything with a grain of salt, but I'll write down this section as a memo on what I know and what I learned about shaders.
#### The rendering process
Rendering a 3D scene is a very complex process. It requires building data structures representing the 3D objects, named meshes, an then drawing it on the screen. Drawing on a screen is pretty much writing some RGB values in a huge buffer in which each pixel is represented. So essentially the only thing we can do to draw an image is to fill some mathematically determined zones :triangular_ruler: with colors to represent the faces of the mesh we've defined. A dumbed down approach would be to use various matrices operations to create a projection of the meshe's vertices on a plan, and then coloring the faces. But then comes the real issue: in which order do we draw the faces? The easiest way would be from the farthest from the "camera" :camera: (point from which we create the projection), but it will draw many invisible faces (from the camera's point of view), which consumes a lot of processing power :muscle:.
All of this to say that it's a complex and multi-step process.
#### But what about the shaders ?
In fact, at some moments in the rendering process, the programmer might want to intervene, to add his special touch to the final image, for example by adding shadows to the image. To do so, he has to write some pieces of codes which will be executed at specific steps of the rendering process. I've learned about 4 different shaders types:
1. **Fragment shaders**: They are called at the end of the rendering process, when the GPU is writing the colored triangles to the VRAM (the so-called _filling of mathematically determined zones_).
2. **Vertex shaders**: They are called much earlier in the rendering process, when the GPU goes through all the vertices of the mesh (and executed for each vertex, generally to compute specific properties of the vertex/material).
3. **Post processing shaders**: Those are made at the very end of the rendering process to add effects to the final image, like blur, tint, or more advanced stuff like rain on the camera's lense and stuff.
4. **Compute shaders**: Those are a special kind, not part of a rendering process, but made to offload computations from the CPU to the highly parallel processing power of the GPU.
#### And how hard is it to write shaders?
The hard part is not much writing the shader itself, but passing your data from your CPU's memory (RAM) to your GPU's memory (VRAM). Those are very separated, and you have to write some extra code in your program to make such a copy, describing your data-structure and all for the transfer to go smoothly. Add to that that Bevy, a very new and not so very documented game engine, uses a very new and not so very documented shading language (WebGPU Shading Language, WGSL), and you have a pretty scary journey ahead of you.
But as Bevy has a very coherent and concise structure, the only things I had to add looked like that:
- Passing the custom attributes
```rust
impl VxChunkMesh {
pub fn new(coord: Vec3, voxels: &[CubeTypes]) -> Self {
let (vertices_coord, uv_coord, vertices_normal, vertices_order, vertices_type, vertices_id) =
build_mesh(voxels);
println!("Created chunk with coord {:?}", coord);
Self {
mesh: Mesh::new(
PrimitiveTopology::TriangleList,
RenderAssetUsages::MAIN_WORLD | RenderAssetUsages::RENDER_WORLD,
)
.with_inserted_attribute(Mesh::ATTRIBUTE_POSITION, vertices_coord.clone())
.with_inserted_attribute(Mesh::ATTRIBUTE_UV_0, uv_coord.clone())
.with_inserted_attribute(Mesh::ATTRIBUTE_NORMAL, vertices_normal.clone())
.with_inserted_attribute(ATTRIBUTE_VX_TYPE, vertices_type.clone()) // Passing my custom vertex attributes
.with_inserted_attribute(ATTRIBUTE_VX_ID, vertices_id.clone()) // Same
.with_inserted_indices(bevy::render::mesh::Indices::U32(vertices_order.clone())),
coord,
}
}
}
```
- Declaring the custom attributes for the pipeline
```rust
// Declaring the vertex attributes
const ATTRIBUTE_VX_TYPE: MeshVertexAttribute =
MeshVertexAttribute::new("VxType", 10000, VertexFormat::Uint32);
const ATTRIBUTE_VX_ID: MeshVertexAttribute =
MeshVertexAttribute::new("VxId", 10001, VertexFormat::Float32);
// Declaring the custom material which will use the shader
#[derive(Asset, TypePath, AsBindGroup, Debug, Clone)]
pub struct ChunkMaterial {
#[uniform(0)]
color: LinearRgba,
#[texture(1)]
#[sampler(2)]
color_texture: Option<Handle<Image>>,
}
impl Material for ChunkMaterial {
// Declaring the fragment shader
fn fragment_shader() -> ShaderRef {
"shaders/chunk_fragment.wgsl".into()
}
// Declaring the vertex shader
fn vertex_shader() -> ShaderRef {
"shaders/chunk_fragment.wgsl".into()
}
// Declaring the data mapping
fn specialize(
_pipeline: &bevy::pbr::MaterialPipeline<Self>,
descriptor: &mut bevy::render::render_resource::RenderPipelineDescriptor,
layout: &bevy::render::mesh::MeshVertexBufferLayoutRef,
_key: bevy::pbr::MaterialPipelineKey<Self>,
) -> Result<(), bevy::render::render_resource::SpecializedMeshPipelineError> {
let vertex_layout = layout.0.get_layout(&[
Mesh::ATTRIBUTE_POSITION.at_shader_location(0),
ATTRIBUTE_VX_TYPE.at_shader_location(1),
ATTRIBUTE_VX_ID.at_shader_location(2),
])?;
descriptor.vertex.buffers = vec![vertex_layout];
Ok(())
}
}
```
- And the shader istelf
```wgsl
@group(2) @binding(0) var<uniform> material_color: vec4<f32>;
// Vertex shader input data mapping
struct Vertex {
@builtin(instance_index) instance_index: u32,
@location(0) position: vec3<f32>,
@location(1) vx_type: u32,
@location(2) vx_id: f32,
};
// Vertex shader output data mapping
struct VertexOutput {
@builtin(position) clip_position: vec4<f32>,
@location(0) hash_color: vec4<f32>,
};
// The vertex shader itself
@vertex
fn vertex(vertex: Vertex) -> VertexOutput {
var out: VertexOutput;
out.clip_position = mesh_position_local_to_clip(
get_world_from_local(vertex.instance_index),
vec4<f32>(vertex.position, 1.0),
);
// Hash function for coloring the mesh according to each vertex position
var p3:vec3<f32> = fract(vec3(vertex.vx_id * 21.2) * vec3(0.1031, 0.1030, 0.0973));
p3 += dot(p3, p3.yzx + 33.33);
p3 = fract((p3.xxz + p3.yzz) * p3.zyx) + 0.05;
out.hash_color = vec4f(p3.x, p3.y, p3.z, 1.0);
return out;
}
// Fragment shader input data mapping
struct FragmentInput {
@location(0) blend_color: vec4<f32>,
};
// The fragment shader itself
@fragment
fn fragment(input: FragmentInput) -> @location(0) vec4<f32> {
return material_color * input.blend_color;
}
```
And all this gibberish finally gives that:
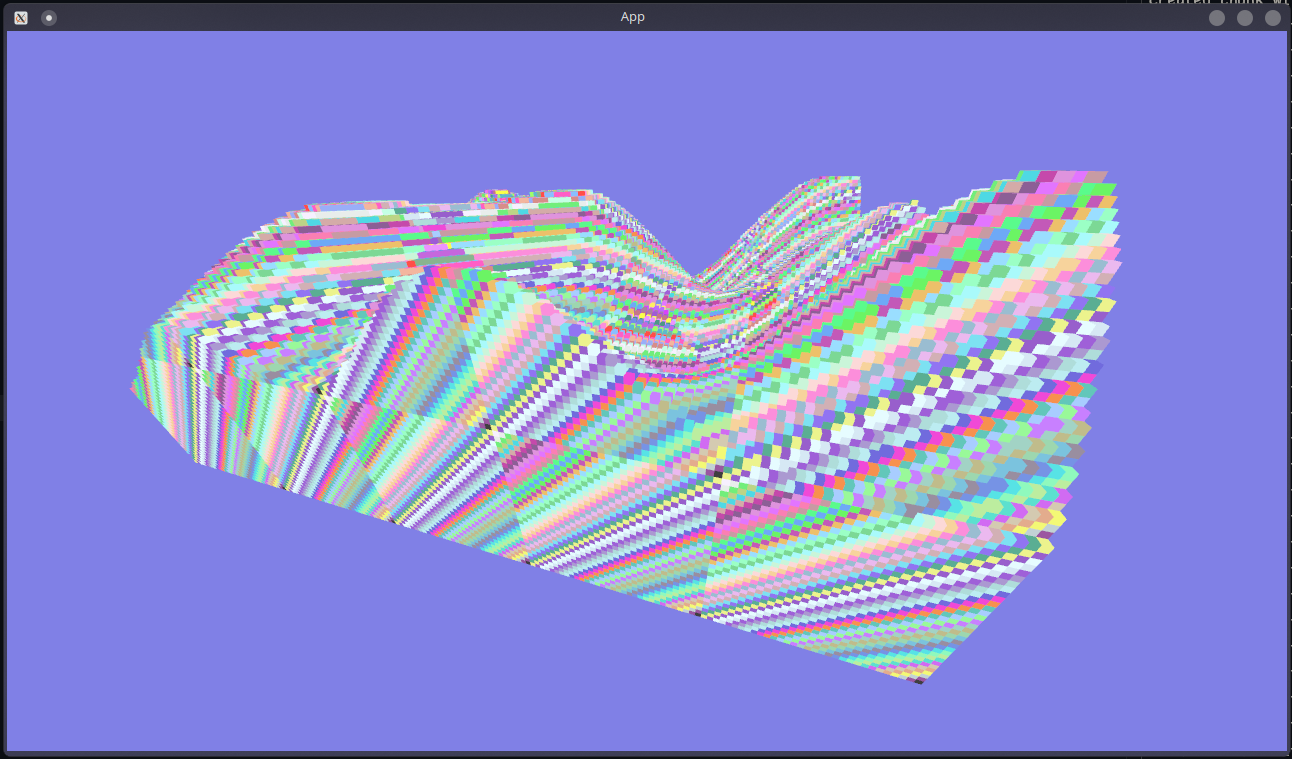
Which is very flashy and not that readable, but demonstrates that the shader is working! Hurray!
### Ambient occlusion
Now, for a sexy render, we'll need to shade our voxels correctly. First step: basic shading according to the face orientation:
And now our task will be to determine for each vertex the amount of light reaching it. To do so, we compute the number of voxels surrounding, and compute for each vertex (0 to 3), and sum it to obtain the configuration it's in, like so:
```rust
fn get_ao(
voxels: &[CubeTypes],
world_coord: &VxWorldCoord,
face_type: FaceType,
) -> (u32, u32, u32, u32) {
if let Some(new_world_coord) = world_coord.move_direction(&face_type.clone().into()) {
let mut ao = (0, 0, 0, 0);
// Let the surrounding of our face look like this:
// b | a | h
// ---0---1---
// c | | g
// ---3---2---
// d | e | f
let direction_a: (i8, i8, i8);
// ...
let direction_h: (i8, i8, i8);
if face_type == FaceType::Right || face_type == FaceType::Left {
// We set the 8 available directions in the X plane
direction_a = (0, 0, -1);
direction_b = (0, -1, -1);
direction_c = (0, -1, 0);
direction_d = (0, -1, 1);
direction_e = (0, 0, 1);
direction_f = (0, 1, 1);
direction_g = (0, 1, 0);
direction_h = (0, 1, -1);
} else if face_type == FaceType::Top || face_type == FaceType::Bottom {
// Same for the Y plane
direction_a = (0, 0, -1);
// ...
direction_h = (1, 0, -1);
} else {
// Same for the Z plane
direction_a = (0, -1, 0);
// ...
direction_h = (1, -1, 0);
}
// a
if is_void(voxels, &new_world_coord, &direction_a) {
ao.0 += 1;
ao.1 += 1;
}
// b
if is_void(voxels, &new_world_coord, &direction_b) {
ao.0 += 1;
}
// ...
// g
if is_void(voxels, &new_world_coord, &direction_g) {
ao.1 += 1;
ao.2 += 1;
}
// h
if is_void(voxels, &new_world_coord, &direction_h) {
ao.1 += 1;
}
ao
} else {
(3, 3, 3, 3)
}
}
```
Then with some magic numbers in our shader associated with each possible value (0-3), we obtain this wonderful render.

And now, time to deal with anisotropy.
We can see some wierd shadow lines in some corners, because of how the faces colors are computed according to their triangular shapes. To tackle the issue, we will re-order some of them to ensure the triangles are in the best orientation for our render.

The difference is subtle, but it's so much more satisfying to the eye.
### Fog
Now lets skip some steps in the video, to focus on fog. This was a tough one to figure out, because the documentation on how to use shaders with Bevy, and all the pre-built shaders tools provided, are minimalistic to say the least.
What I finally found out after hours of searching and experimenting, is that in the fragment shader, the z coordinate of the `clip_ position` variable represents a sort of distance to the player, but it's contained between 0 and 1, and 1 means close and zero means infinitely far (sorta). So inversing it gives us the information we need to create the fog effect.
We use a formula similar to the one in the video:
```wgsl
// TODO: add relevant shader code
```
And tadaaa:
